Saturday, January 16, 2016

Mascarpone cream

I like mascarpone cream, not too sweet like buttercream :) I use it for making filling of different cakes.

Vanilla mascarpone cream matches Earl grey chiffon cake perfectly! Love this combination!


Ingredients of mascarpone cream 
(filling the middle part of the chiffon cake)
150g mascarpone
30g icing sugar
37ml whole milk
1g vanilla extract*

* Green tea flavor = 6g powder

Instructions
1. Beat mascarpone until it becomes smooth

2. Add in the rest of the ingredients, beat them until well blended and the mixture becomes smooth
Note: It is normal if it looks a bit liquid, will be firm after cooling down

3. Store in the fridge few hours before use

Now it can be chiffon cake filling, swiss roll filling, or cupcake filling!


Mascarpone cream fills the middle of the chiffon cake
The top is the whipping cream

Enjoy!

Friday, January 15, 2016

Apple tart in rose

I got some apples left in the fridge... hmmm... let me turn them into something beautiful and tasty :)
This rose decoration is from a photo that I saw on internet, not in cupcake size but bigger size! As I wanted to make something for my husband's colleagues, so I tried to make one.... it turns out nicely, yay :)

Now let me share my observation and things to be careful when you make this rose apple tart.

I think the most important thing to be careful is to cook the apple slices, so that they won't break when you make them in rose shape.


Ingredients (11" ring mould)
3.5-4 medium size apples

2tbsp cane sugar
1tbsp honey
3tbsp water
cinnamon or nutmeg (add more or less according to your flavor)

300g Short crust pastry

*6" mould needs about 2-2.5 apples

Instructions
1. Roll out the pastry flat and evenly, place it on a ring mould or any tart mould
Use a fork to pinch some holes on the dough surface
Store in the fridge for the moment

2. Cut the apples into half, trim the top, bottom and the middle part of the apples, do not peel off the skin :)
Carefully cut them into thin slice, I tried to slice them into about 0.1-0.2cm in average... but don't worry, once they are cook, they become soft. Try to slice them as thin as you can

3. In a pan, put the 2/3 sliced apples (all small & medium slices should be cooked), sugar, honey and water
Bring it to boil, then keep it at low heat, let it cook for 3-5mins or until they are soft => you can tell by the texture and color

ATTENTION: you'll notice they are in different sizes, try to sort them into different sizes, for example, place the same size on the same plates

Note 1: using a pan is better than a pot because you can spread them out instead of stacking all together, you will find it less chance to break them

Note 2: the thinner slices are easier to cook, so when they are cook, remove them from the pan, I used chopsticks to help, I think better not to use fork to pinch them, you might use a clip... 

4. Once you take out all the apple slices from the pan to a plate, you'll notice water remains on the pan, do not throw it away, you can add some honey, stir constantly and let it cook until you start seeing many small bubbles start popping out, turn the heat off immediately => then you make the topping (to glaze the apple tart at the end)!

Cover it and set it aside 

Note: If you found the topping is rather sticky, you can add water: drop by drop! otherwise it will become watery again

5. When the apple slices are cooled down or you are able to touch it without burning your fingers, you can start laying the slices on the tart dough

6. We start the rose from the middle and spread it outward
We start with the small size (but not the smallest one, keep them until the end), take one slice and roll it tightly, hold it, take another one to cover the first one tightly
Repeat the same process until you can't hold the rose any more, you can try to place it in the middle of the dough, normally it will stick to one another nicely

7. Each time you add one more slices, make sure you overlap the previous one, at least half of the size of the previous one, so that they look nice

8. When you lay the fresh apple slices, you might find it difficult to stick to the previous slice, but be patient, try to overlap more to the previous one and use a hand to hold it and another hand grab slices and lay them

When you come to the last big slice on the dough, you will notice that there will be only the smallest ones left
You can now place them on the edge and hide them

You might also notice that the slices are all standing up straight especially the outer part around the tart, if that's the case, gently press down the fresh slices towards the edge, it looks more natural like the flower is blooming


 This is how it looks before baking


9. Now you can put the tart back to the fridge for 1-2hours to let the dough relax

10. After 1-2hrs, preheat the oven at 180°c, when it's ready, put the tart into the oven and bake for:
Medium size (6") = about 25-30mins
Large size (11") = about 40mins

If you think the tart edges are not in golden color but the apple starts looking burn, you can:
i/ Turn the oven function to "heat only at the bottom". If you don't have this function, you might need aluminium foil to cover the surface, but I am afraid that would stick on the surface. When you remove the foil, you might pull out the slices as well...

ii/ Remove the ring and put it back to the oven until you see the edge turns golden color

11. When the tart is cooled down, remember the topping, glaze the top with a brush - to keep the tart shiny and look nice. Also it adds some sweetness especially to the fresh apple slices at the outer part of the tart

------------------------------------------------
Q: You might also encounter this problem - You finish laying all the apple slices but you don't have enough apple slices to lay on the rest of the dough. What should you do?

A: Do not panic. Take out 1 fresh apple or more if you think you need more, repeat step 2 cut them into slices. In this case, you won't cook them but try to slice them thin so it won't break easily.

If you can fit the small ones between the layers or at the edge, go ahead and do it, or you can eat them all :)

---------------------------------------------------
Q: You might find 1/2 apple or more left, what to do with them?

A: 1. You can eat them fresh
2. If they are not cook, make detox water - put them in a jar with cinnamon stick (ONLY, not powder) OR with other fruits such as lemon slices... fill the jar with 1L water and let it sit for few hours before serving!

Enjoy!

Wednesday, January 13, 2016

Brussels sprout gratin

Another recipe for Brussels sprouts to share with you, it is like French cheese gratin but this time we use Brussels sprout instead of potato.


Ingredients
About 40 Brussels sprouts

Bechamel sauce:
2tbsp butter
2tbsp flour
2 cups whole milk (I used skim milk instead of whole milk)
Salt & pepper
2/3 cup grated smoked Gouda cheese (I used regular grated cheese)

2/3cup grated aged Gouda cheese (I used regular grated cheese)
Coarse salt

Instructions
1. Preheat the oven at 190°c

2. Prepare the bechamel: 
- In a sauce pan, melt butter at medium heat

- Add flour and whisk until mixture, mix well

- Whisk in 1/2cup milk at first, to blend well into the mixture, then pour little by little the rest of the milk

- Raise heat to medium high and bring to boil. Keep stirring. Now the milk becomes hotter

- Reduce heat to low and cook, keep stirring with a spetula or wooden spoon, until thickened, it takes about 12-15 mins

- Add in salt and pepper, mix well

- Turn off the heat, add cheese and stir until melted

3. Cook the Brussels sprouts:
- In a pot, boil the water and then add in Brussels sprouts
- Cook for 10mins until tender => use a knife to pierce into the sprouts
- Remove water, then transfer the sprouts to a baking dish

4. Assemble gratin:
Pour bechamel over the Brussels and sprinkle the cheese and salt
Bake for 25mins or until golden

Enjoy!

Tuesday, January 12, 2016

Indian curry vegetables

I love Indian food, since we moved to Belgium, we couldn't find any Indian restaurant :( BUT.... we have Indian friends! yay! Every time they make curry, I always eat twice more than usual... So I asked for the recipe so that I need not to wait for gatherings to taste the curry :)

Regarding vegetables, you can use whatever vegetables that you like... but the MUST ingredients are onion and tomatoes in this recipe. 
The most important thing is that the seasoning, if you use certain seasoning, you can't make good curry.


Ingredients (3-4 person)
1 onion
3 medium size carrots
100g haricot
100g broccoli
200g mushroom
3-4 tomatoes

Optional: potato, green pepper, cauliflower... Be creative!

Seasoning
2tsp coriander powder (I like using coriander seeds)
1/2tsp tumeric powder
1tsp chilly powder
1/2tsp garam masala

1 can coconut milk

Instructions
1. In a big pot, at medium fire, fry coriander seeds with oil and onion
Note: if you use coriander powder, you can add later with all seasonings...

2. When you smell the flavor coming out, add carrots, haricot and broccoli & all the seasoning EXCEPT coconut milk, stir well

Cover the lid and let it cook until the veggies become soft - use a fork and pinch in the carrots to test if it is soft

3. Add in mushroom and coconut milk, stir well, let it cook until the coconut milk boils

4. When the milk starts boiling, add in tomatoes, cook for 5 mins and turn off the heat

Serve hot with rice or naan!
Enjoy!

Saturday, January 9, 2016

Quiche without crust

I found a piece of paper in my recipe box, I know it is a French dish but not sure whether it is flan or quiche or what... as no title is written... so I tried it to see how it turns out.

Surprising it turns out great, my husband loves it, he even accepts eating Brussels sprouts :) I am so happy and encouraged, I will make it again!


Ingredients
16 Brussels sprouts*
3 medium size carrots, sliced

70g grated cheese
2 tbsp corn starch

5 eggs (original recipes = 4 eggs)
200g cream liquid (original recipes = 150g)
salt & pepper

1 onion, diced
3 big mushrooms, sliced
3 tomatoes

*it is written 2 courgettes on the paper, but I don't have any, so replace it by Brussels sprouts, you can use broccoli too!

Instructions
1. Wash the brussels sprouts
In a pot, fill with water and boil it. When water is boiled, put the brussels sprouts and carrots, let it cook for 10mins, use a fork to test if it becomes soft

Remove water, set it aside to let it cool down

2. Preheat the oven at 200°c

When it is cooled down, cut the brussels sprouts into 4 (1/4size large)

3. In a large mixing bowl, mix cheese and corn starch
Add in eggs, mix well
Add cream & salt & pepper, mix well

4. Add in brussels sprouts, carrots, onion and mushrooms, mix well
Add in tomatoes, mix it briefly to avoid pressing the juice out

5. Place the mixture to a pan
Bake it for 40-45mins until the surface becomes golden color

Enjoy!

Thursday, January 7, 2016

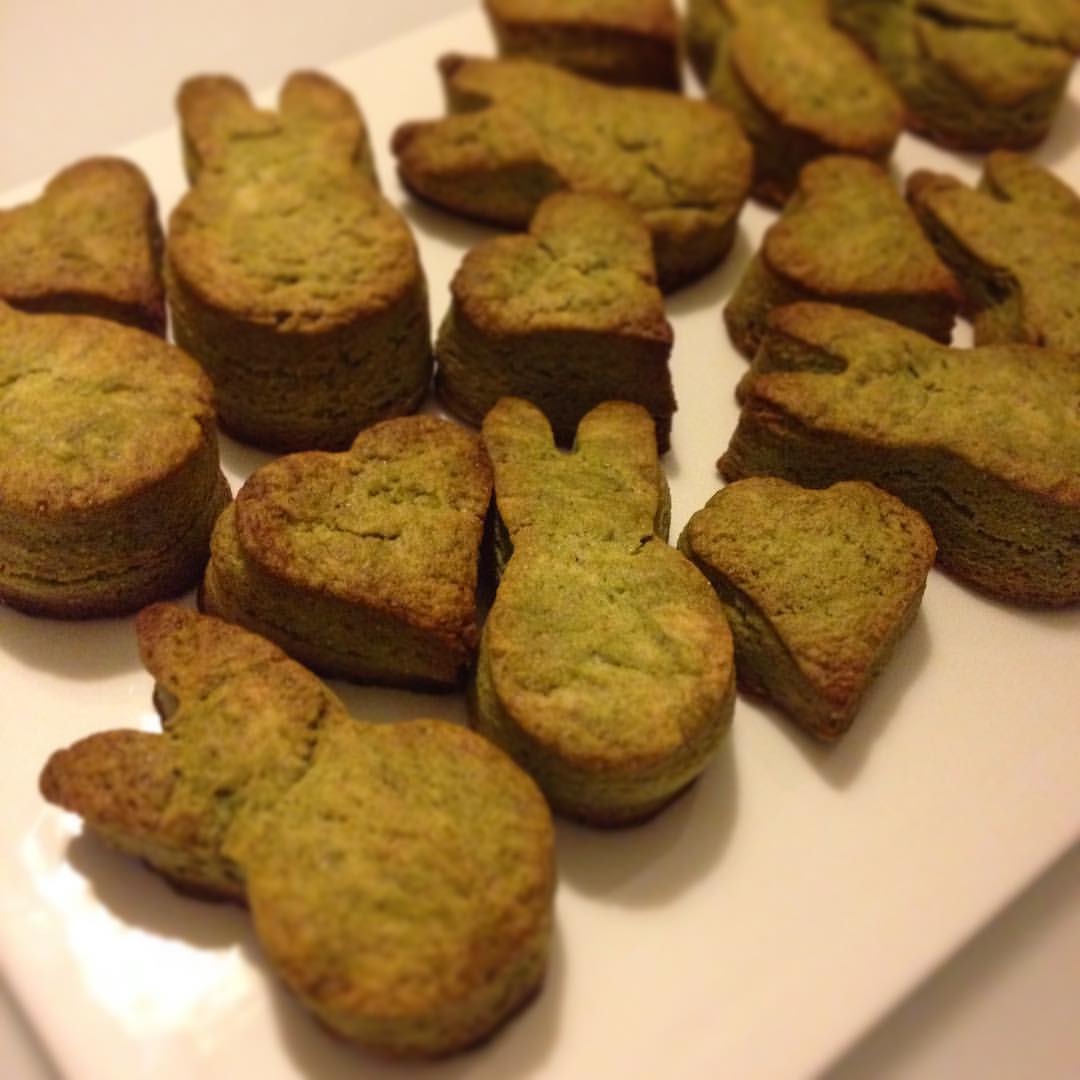
Matcha / Green tea scone

I love scone, because of its flavor, smell strong butter :)
Usually I love eating it for breakfast or even sometimes during tea time...

I just discover this recipe in one of my cook book, I want to share with you all.


Ingredients
170g butter
4g salt
85g sugar
405g flour
1tsp baking powder

16g matcha powder

1 egg
55g 30% fat cream

Instructions
1. In a large mixing bowl, mix butter, salt, sugar, mix well
Add in flour, baking powder and matcha powder, mix well

2. Add in egg and cream, mix well

3. Place the dough on the working surface, knead the dough with your hands
Roll the dough into ball, and squeeze it flat
Wrap the dough by plastic wrap, put the dough into fridge for 30mins

4. After 30mins, preheat the oven at 190°c

5. Divide the dough into 2, which is easier to work with half
Roll one portion out to about 1.5cm
Use cookie cutter to to cut the dough

6. Line the baking tray with baking sheet
Place the dough on the baking tray, put the tray into the oven and bake for 25mins

Serve hot
Enjoy!

Wednesday, January 6, 2016

American pancake

American breakfast has delicious & hot pancake serving with syrup and butter.... yummy...
My friend gave me a recipe so I tried it, it is very nice! I just need to start preparing it the night before :)


Ingredients
20g warm milk
1g dried yeast (I used 3g fresh yeast)

2 eggs
50g honey
20g melted butter

200g milk

200g flour

Serving:
Butter
Syrup

Instructions
Prepare the pancake mixture the night before:
1. In a small bowl, mix warm milk and dried yeast, let the yeast dissolved into the milk
set aside

2. In a large mixing bowl, mix egg, honey, butter, mix well
 Add in warm milk mixture and milk, mix well

3. Add in flour, little by little, blend them well
Cover the mixture with plastic wrap and leave it at room temperature for 1 hour

4. After 1 hour, use a spoon to mix the mixture again
Put it in the fridge, let it rest for 12-15hours

Cook the pancake on the day after:
1. Heat the pan at medium heat, when it is hot enough, turn down the heat to low

2. Use a ladle to scoop the pancake mixture, gently pour it onto the pan

3. When the surface appears little bubbles, flip the pancake to the other side and let it cook for 20sec

4. Repeat step 2 & 3 until the pancake mixture is used up - they are all pancakes now!
Serve hot with butter and syrup

Enjoy!